
들어가기 전에
F-lab 프로젝트가 끝나고 비슷한 기술 스택을 사용하는 프로젝트 강의를 보면서 어떤 걸 더 고민하고 개선할 수 있을지 시야를 넓히려고 하고 있다. 마침 간단한 SNS 서비스를 만들면서 대용량 프래픽을 고려했을 때 어떤 점들을 개선시킬 수 있는지를 담은 강의가 있었는데 비슷한 알람 기능이 있었다. 우리도 알람 조회 API를 통해 알람을 확인하는 기능까지는 개발했다보니 그 이후에 할 수 있는 고민을 알게 되고 또 직접 구현해 보는 게 굉장히 흥미로웠다.
기본적인 기능은 게시물에 댓글을 달거나 좋아요를 클릭하는 등의 특정 이벤트가 발생했을 때 그 내용이 수신자에게 알람 데이터로 저장이 되고 수신자는 알람 조회 API를 통해 내게 온 알람들을 확인할 수 있는 것이다. 이때 조회 페이지를 새로고침하지 않더라도 새로온 알람을 확인할 수 있게 구현하려면 어떻게 해야 할까?
고려해 볼 수 있는 기능들
[Client pull]
1. Polling

- 일정 주기를 가지고 서버의 API를 호출하는 방법
- 실시간으로 데이터가 업데이트되지 않는다.
- 불필요한 요청이 발생하며 따라서 불필요한 서버 부하가 발생한다.
2. Long polling

- 서버로 요청이 들어올 경우 일정 시간동안 대기했다가 요청한 데이터가 업데이트된 경우 서버에서 웹브라우저로 응답을 보낸다.
- 연결이 된 경우 실시간으로 데이터가 들어온다.
- Polling보다 개선된 형태이지만 데이터 업데이트가 빈번한 경우 Polling과 유사하다.
3. Short polling
- 서버료 요청이 들어오면 업데이트된 데이터가 있으나 없으나 모두 응답을 보낸다.
- Long polling과의 차이점은 서버에 업데이트가 없을 때 업데이트가 발생할 때까지 연결을 유지하고 있느냐의 차이이다.
[Server push]
1. SSE(Server-Sent Events)
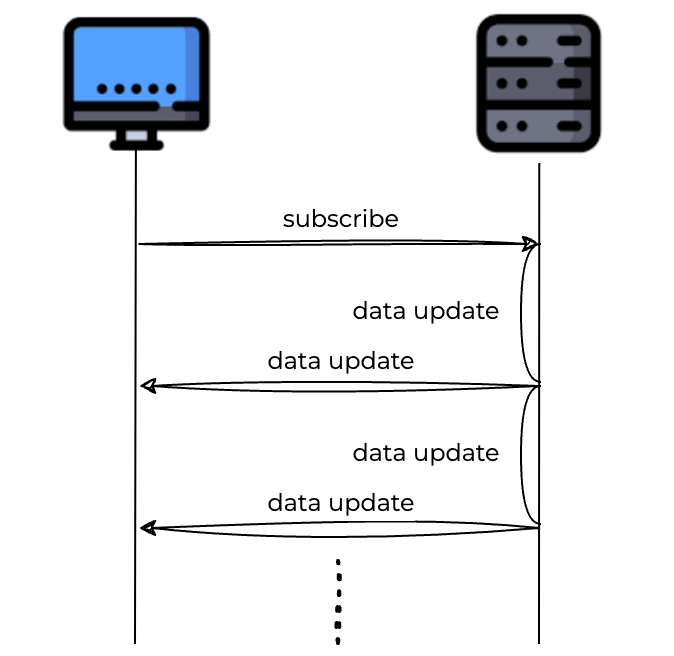
- 서버에서 웹브라우저로 데이터를 보내줄 수 있다.
- 웹브라우저에서 서버쪽으로 특정 이벤트를 구독함을 알려준다.
- 서버에서는 해당 이벤트가 발생하면 웹브라우저쪽으로 이벤트를 보내준다.
2. Websocket
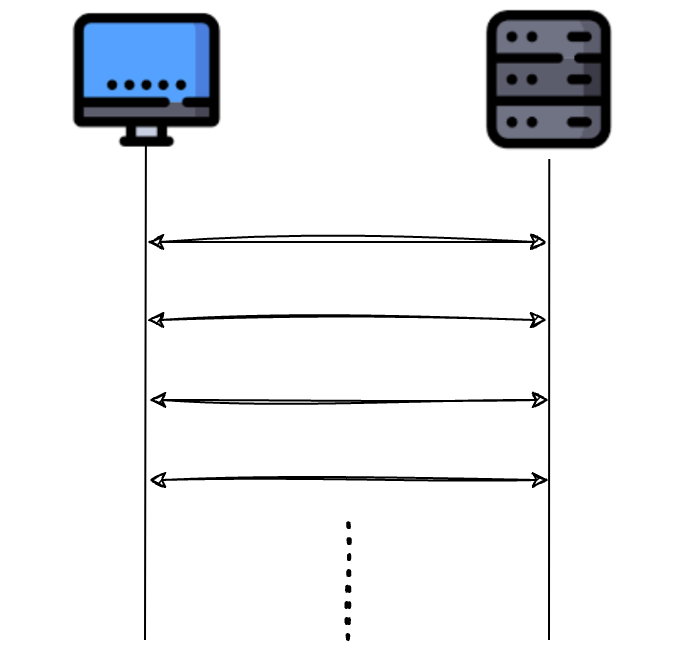
- 서버에서 웹 브라우저 사이 양방향 통신이 가능한 방법이다.
이번 포스트에서는 SSE로 알람 서비스를 개선해 보기로 한다.
Spring에서의 SSE 구현
Spring에서는 4.2 버전부터 지원하고 있는 SseEmitter라는 클래스를 활용해서 서버에서 클라이언트로 이벤트를 전달하는 SSE기반 API를 구현할 수 있다.

아래 코드들은 이전에 이미 간단하게 특정한 이벤트가 발생했을 때 알람 데이터를 저장하고 조회할 수 있는 API를 만들었다고 가정한다.
전체적인 과정은 이러하다.
- 먼저 클라이언트에서 서버로 업데이트 된 데이터를 받을 수 있도록 요청(구독)한다.
- 서버에서 클라이언트와 통신하기 위한 SseEmitter 객체를 생성한다.
- 서버에서는 업데이트가 발생했을 때 클라이언트에 해당 정보를 반환한다.
이때 클라이언트 쪽에서는 EventSource API를 활용할 수 있는데 서버와의 연결이 이루어졌다거나, 서버에서 보내는 데이터를 받아 처리할 수 있다. 해당 포스트에서는 자바 코드를 중심적으로 작성할 것이기 때문에 해당 내용은 포함되지 않는다.
[클라이언트 ➡️ 서버]
1. SseEmitter를 반환하는 subscribe API를 구현한다.
UserController
// 출처 : 패스트캠퍼스 <대규모 트래픽을 고려한 간단한 SNS 서비스> 강의
@GetMapping("/alarm/subscribe")
public SseEmitter subscribe(Authentication authentication) {
    // User 가져오는 코드 생략
    return alarmService.connectAlarm(user.getId());
}
[서버 ➡️ 클라이언트]
1. 연결이 이루어졌을 때 정보를 보내주기 위한 connetAlarm 메소드를 구현한다.
AlarmService
public SseEmitter connectAlarm(Integer userId) {
    SseEmitter sseEmitter = new SseEmitter(DEFAULT_TIMEOUT);
    emitterRepository.save(userId, sseEmitter);
    sseEmitter.onCompletion(() -> emitterRepository.delete(userId));
    sseEmitter.onTimeout(() -> emitterRepository.delete(userId));

    try {
        sseEmitter.send(SseEmitter.event()
            .id("id")
            .name(ALARM_NAME)
            .data("connect completed."));
    } catch (IOException e) {
        throw new SnsApplicationException(ErrorCode.ALARM_CONNECT_ERROR);
    }
    return sseEmitter;
}
❶ SseEmitter sseEmitter = new SseEmitter(DEFAULT_TIMEOUT);
SseEmitter 객체를 생성하면서 Timeout(연결 만료 시간)을 설정한다.
❷ emitterRepository.save(userId, sseEmitter);
각 브라우저마다 하나씩 생성되는 객체를 구분하기 위해 해당 정보를 EmitterRepository를 생성해서 저장한다. (아래 코드 참조)
❸ sseEmitter.onCompletion(() -> emitterRepository.delete(userId));
요청이 완료될 때 실행될 동작을 설정한다.
❹ sseEmitter.onTimeout(() -> emitterRepository.delete(userId));
Timeout 시 실행될 동작을 설정한다.
❺ sseEmitter.send()
- 연결되었다는 이벤트를 보내준다.
- id 값은 이번 과정에서 크게 의미가 없어 임의의 값으로 해주었다.
- name 값은 클라이언트 측의 Listener에서 미리 설정한 이벤트 이름으로 설정하면 된다.

EmitterRepository
public class EmitterRepository {

    private Map<String, SseEmitter> emitterMap = new HashMap<>();

    public SseEmitter save(Integer userId, SseEmitter emitter) {
        final String key = getKey(userId);
        log.info("Set Emitter {}", key);
        emitterMap.put(key, emitter);
        return emitter;
    }
    public void delete(Integer userId) {
        emitterMap.remove(getKey(userId));
    }

    public Optional<SseEmitter> get(Integer userId) {
        SseEmitter result = emitterMap.get(getKey(userId));
        log.info("Get Emitter {}", result);
        return Optional.ofNullable(result);
    }

    private String getKey(Integer userId) {
        return "Emitter:UID:" + userId;
    }
}
참고로 위의 코드에서는 글로벌 캐시가 아닌 로컬 캐시에서 유저 아이디와 SseEmitter를 관리하므로 2대 이상의 서버를 사용하는 환경이라면 레디스와 같은 글로벌 캐시로 변경해야 한다.
2. 서버에서 클라이언트 측으로 이벤트를 보내주기 위한 send 메소드를 구현한다.
AlarmService
public void send(Integer alarmId, Integer userId) {
    emitterRepository.get(userId).ifPresentOrElse(sseEmitter -> {
        try {
            sseEmitter.send(SseEmitter.event()
                .id(alarmId.toString())
                .name(ALARM_NAME)
                .data("new alarm"));
        } catch (IOException e) {
            emitterRepository.delete(userId);
            throw new SnsApplicationException(ErrorCode.ALARM_CONNECT_ERROR);
        }
    },
        () -> log.info("Not emitter founded")
    );
}- 유저 정보로 저장해 둔 SseEmitter 객체를 가져온다.
- 해당 SseEmitter를 활용해서 이벤트를 전송한다.
3. 알람을 적용할 이벤트에서 해당 메소드를 호출하는 코드를 추가한다.
PostService
@Transactional
public void like(Integer postId, String username) {
    /*
    	좋아요 관련 기능 코드 생략
    */

    AlarmEntity alarmEntity = alarmEntityRepository.save(AlarmEntity.of(postEntity.getUser(), AlarmType.NEW_LIKE_ON_POST,
        new AlarmArgs(userEntity.getId(), postId)));
    alarmService.send(alarmEntity.getId(), postEntity.getUser().getId());
}
전체 코드는 이곳에서 확인할 수 있다.
참고
'Spring' 카테고리의 다른 글
| [Spring] 빈은 순서를 가진다 - Error creating bean 문제 해결 (2) | 2025.01.19 |
|---|---|
| [Spring] Custom Filter로 로그 파밍하기 (CloudWatch X Logback) (4) | 2024.10.09 |
| [Spring] 로컬 캐시를 활용한 Refresh Token 구현기 (feat. Caffeine) (0) | 2023.05.28 |
| [Spring Security] POST 테스트 : 403 Forbidden 에러 해결 (0) | 2023.05.17 |
| [Spring] 쉽게 이해하는 Spring Security + JWT 로그인 구현기 (0) | 2023.05.12 |


